A clean stylus is of utmost importance regarding the proper functioning and longevity of a turntable. It’s a delicate part that serves as the primary medium, and regular cleaning and maintenance are necessary to avoid common problems such as distorted sound, skipping, increased surface noise, and record wear.
In this article, I will provide you with a guide on how to clean a record needle, including step-by-step instructions and valuable tips. By following these guidelines, you can enjoy the full richness and clarity of your vinyl collection and preserve its longevity for years to come.
Identifying when your record needle needs cleaning

By noticing the signs that indicate the cleanup time, you can take proactive steps to maintain the record needle clean and ensure that your records sound pristine.
Visible signs of dust or debris
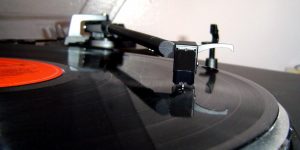
Carefully examine the stylus under a bright light or using a magnifying glass. Look for visible signs of dust, dirt, or debris clinging to the stylus tip. Even small particles can affect performance, so if you see any buildup, it’s a clear indication that cleaning is necessary.
Regularly inspect your records after playback. If you notice an accumulation of dust or debris on the record surface, it’s likely that some of it has transferred onto the stylus. Cleaning the stylus will help prevent further contamination of your records.
Changes in sound quality
If you notice distortion, muffled sound, or an overall decrease in audio quality while playing your records, it could be an indication that the stylus needs cleaning. Accumulated dust and debris on the needle can interfere with its ability to accurately track the grooves, resulting in compromised sound reproduction.
When the stylus encounters some particles on the record, it may cause the needle to skip or jump across the grooves. If you experience frequent skipping during playback, it’s also a good indicator that the stylus needs cleaning.
If you encounter issues with tracking force, where the stylus is applying too much or too little pressure on the record, it could be due to a dirty stylus. Inconsistent playback, speed variations, or difficulty maintaining proper tracking may indicate the need for cleaning.
If you experience any of the above issues or notice visible dirt on the stylus, it’s important to proceed with a proper cleaning regimen to ensure optimal performance and prevent potential damage to your records and stylus.
The cleaning process

I tend to clean my stylus regularly, especially after every few hours of playtime. There is no definite decision on how to clean it because it all depends on the type of player and its components, but the main rules I can highlight are as follows.
Preparing your workspace
It’s important to set up an organized workspace. I recommend you these steps to follow when initiating the cleaning of the stylus:
- Choose a location with good lighting. Ensure the area is free from dust, dirt, and other debris that could potentially contaminate the stylus during the process.
- Prepare the tools you’ll need for cleaning the turntable stylus. This typically includes a stylus cleaning brush or stylus cleaning solution, a lint-free cloth, and possibly a magnifying glass for closer inspection.
- Make sure to turn off your device. This ensures that the needle remains stationary and reduces the risk of accidental damage.
Step-by-step needle cleaning guide
Once you have prepared your workspace, you can proceed with the step-by-step needle-cleaning process. Here’s a general guide to follow:
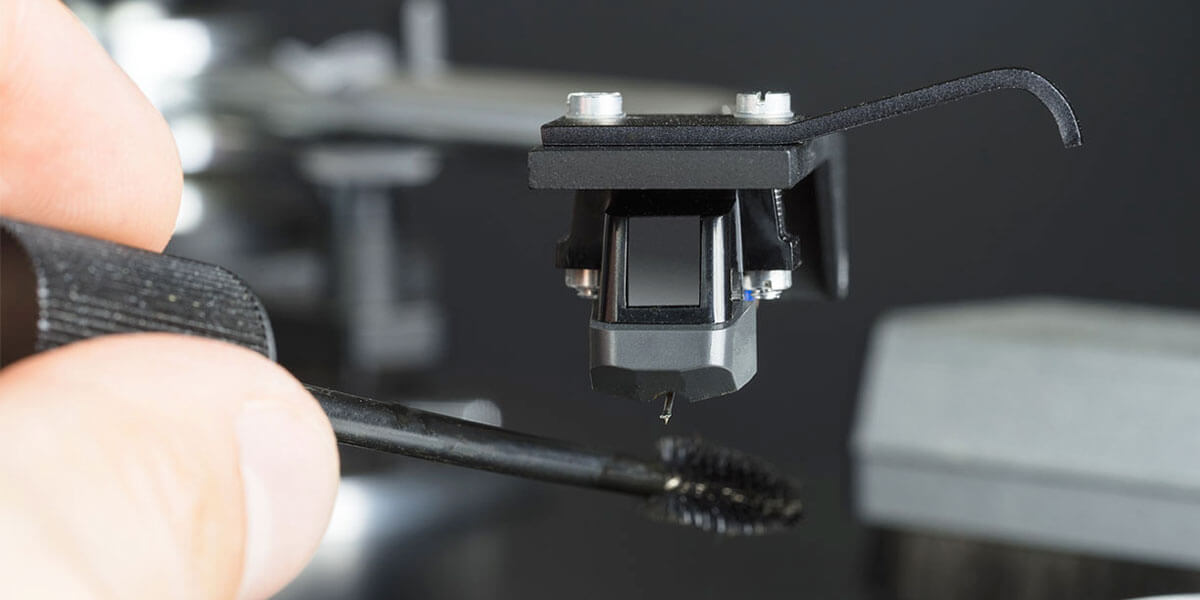
- If you’re using a stylus cleaning brush, gently brush the stylus from back to front (never side to side) a few times. This helps dislodge any particles stuck to the stylus. I always use a dedicated cleaning brush specifically designed for this purpose to avoid damaging the delicate stylus tip.
- If you’re using a solution, carefully follow the manufacturer’s instructions. Typically, I apply a few drops of the solution onto a brush and gently lower the stylus onto it to allow the cleaning solution to dissolve any debris. Lift the stylus straight up to avoid any side-to-side movements.
- After using the brush and solution, I take a lint-free cloth and gently wipe the stylus from back to front. This helps remove any remaining residue or moisture from the stylus tip.
- If you notice any dirt still present on the stylus, repeat the cleaning process as needed. However, it’s important not to overdo it.
Safety tips during cleaning
The stylus is a delicate component, so it’s crucial to handle it gently. Avoid touching the stylus tip with your fingers or any sharp objects, as this can cause damage or misalignment. Always use tools specifically made for stylus cleaning since improper tools or household cleaning products can potentially harm the stylus.
Carefully read and follow the instructions of the tools provided by the manufacturer. Each solution may have specific application methods and safety precautions.
When brushing or wiping the stylus, apply gentle and even pressure. Excessive force can damage the stylus or cause misalignment, affecting its performance.
Maintaining your record needle

Establishing a systematic maintenance schedule will help you stay on top of needle cleanliness. My guidelines will help you to ensure that your records are played in the top possible condition:
- Clean your records: Before playing a record, I use an anti-static record cleaning brush to remove any surface dust. This helps prevent dust from transferring to the needle during playback.
- Store your records properly: I keep them in clean, anti-static inner sleeves and store them upright. Avoid touching the record’s playing surface to minimize the transfer of oils and dirt.
- Use a record cleaning machine: These machines use various methods, such as vacuum suction or ultrasonic cleaning, to remove embedded dirt and contaminants from the record surface.
- Invest in a record mat or platter mat: They can help minimize static electricity and reduce the attraction of dust particles to the record surface. Choose a high-quality mat made from materials that are non-shedding.
- Keep the turntable clean: I regularly clean the turntable platter and tonearm to prevent dust from accumulating.
- Check the stylus alignment: Incorrect alignment can cause uneven wear and compromise sound quality, so you should check it with the stylus alignment tool.
- Avoid excessive tracking force: Ensure that the tracking force of your turntable is properly set according to the manufacturer’s recommendations. I use a calibrated stylus force gauge to accurately set the tracking force.
By adhering to a regular maintenance schedule and implementing these preventive measures, you can keep your record needle clean and ensure optimal sound quality while prolonging the lifespan of your records and stylus.


![Connect a Turntable to Your Wireless Bluetooth Speakers [Easy Guide]](https://www.vinylrecordday.org/wp-content/uploads/2021/12/tuntable-and-sonos-speaker-300x150.jpg)